

It became clear pretty quickly that the one area where we were ill-equipped for this renovation was in the area of DESIGN. While I love to watch HGTV, it overwhelmed me to have to pick out paint colors for the rental house, and because neither my husband, Lucas, nor I felt comfortable in this area, it was the area that brought us the most stress (read: arguments).
So, we called in the big guns.
I recommend this to anyone who is able to identify the area of most stress. Once we identified that the design (paint, lighting finishings) was a tough spot for us, I reached to my highly-talented, design-savvy friend from graduate school, Jess. I asked her to come out for a weekend (with her handy husband and adorable baby) and help us overcome this obstacle. And because she’s amazing and flexible and the world’s best friend, she came out.
We spent a weekend trekking from the Habitat Restore to Home Depot to Sutherlands, looking at floor tile, countertops, backsplash, paint colors, lighting, and finishings. And you know what? There were zero arguments. Jess’ expertise and our total trust in her design eye allowed us to make quick decisions, without stress. When we disagreed, Jess was the tie-breaker we were both comfortable with. And we had the world’s cutest baby with us, which definitely didn’t hurt the situation either.
Future renovators…DO THIS. Figure out your points of contention and invite people in to help you. Renovating a house is stressful. Eliminating areas prone to disagreement by inviting in an expert or tie-breaker will help make the process so much smoother.
By the way, if you don’t have a Jess in your life, Pinterest is a great place to start for design tips. It can be a little overwhelming, but the more specific you make your search, the more useful the results.
Since we have a lot of aesthetic updates in this renovation, we’ll start with just the exterior today. Here’s what our house looked like when we bought it:
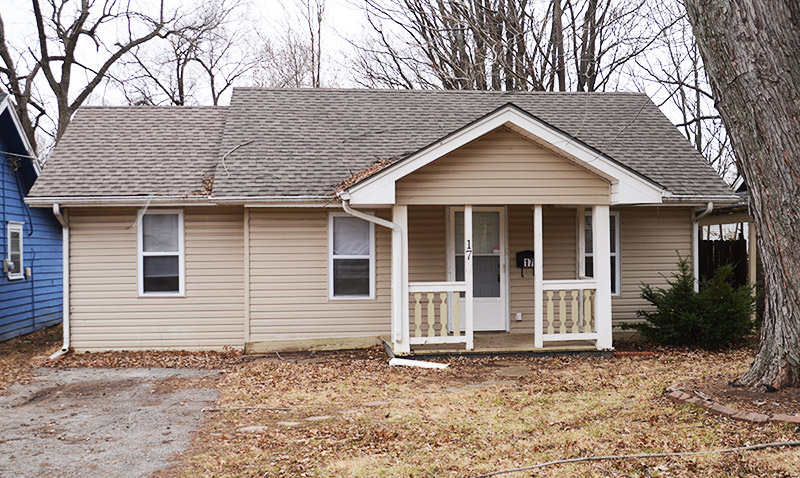
EXTERIOR RENO PLANS:
- Power wash the exterior and porch
- Paint all of the porch a fresh coat of bright white (NOTE: there are different kinds of paint—flat, eggshell, semi-gloss, etc. Each one should be used for different things. I’m going to talk about this early next week. Make sure you sign up to receive updates from this column, so you don’t miss it! Go here to do that.) See the difference already in this photo (right side painted, left side still the old paint).
- Pick a fun color for the door –Jess inspired us to land on BEHR T16-04 Galapagos Turquoise
- Pick a color for the floor boards of the porch – Jess helped us pick a slightly darker shade of the tan on the exterior of our house: BEHR #PPU5-14 Mesa Taupe
- Add shutters – at this moment, we have not yet found the shutters. We are looking for taupe (see inspiration photo from Pinterest)


Just these little updates will make a big difference to the curb appeal of the home. While we’re not as focused on curb appeal for a rental as we would be for a traditional fix and flip, we do want the home to make a good first impression. I can’t wait to show you pictures when it’s finally done!
Stay up to date with this column so you can see the final product. Sign up here.


0 Comments